Thursday, June 30, 2011

Independence Day - Wendy Mind

As part of our Design Team challenges this month we were required to create a card for July 4th (American Independence Day) or My niece Chloe's birthday. This card would work for any little girl's birthday!!!

I have used the paper doll outfit with the paperdoll in this card and have just mounted her on some circles I cut using my Lifestyle Crafts Nesting Circles. A added a few final touches with the photo frame corners and Chick-a-Dee 4 X 8 alpha. Also no card fit for a celebration is finished until there is a truck load of bling on it!!!

Marge Robertson

Cut Anna Griffin Paper to fit card (9”x4”) and cover card front.  Cut Bird Cages (#0313) die from blue CS and glue to card front above border.  Stamp bird inside cage and sentiment on cream CS and add near base of cage.  Decorate cage, base and card’s border with ZVA Creative Pearls.  Add fiber trim around card & tie in front (to secure inside paper liner).


Wednesday, June 29, 2011

Ute Thenert

It was a pleasure for me to work with the Letterpress Starter Kit and the other plates from Lifestyle Crafts for this black and white card.
The basiscard and the frame were designed with the backing plate of the Baby
Printing Plate from Lifestyle Crafts. The border was made with the Wedding Plate, additional just handmade little lines, a black ribbon and black pearls, and very important, the motif and the phrase.
It is such an easy way to make a perfect card!

Tuesday, June 28, 2011

Lynette Neus

Kanban Stamps, CardstockCavendish Ladies Day at
the Races stamps, Bella Damask - Mocha Cardstock


Monday, June 27, 2011

Marge Robertson


This double-pocket card follows a pattern I’ve had for years on computer paper. It requires one 8 ½” x 11“ sheet of CS (all-over patterns work; one-way patterns will not). Fold CS in half vertically at center. Cut at horizontal center from left edge to center fold. Measure 3 ½” from top left corner to both vertical & horizontal center and fold corner down. Fold top left section over top right section with folded corner to inside. Create a 4 ¼” folded corner at bottom right just as you did on top left corner and fold this section up over top right section, folding left bottom section to the back of your card. To complete double-pocket card, tape first pocket edge to card front; tape bottom left pocket edges down. For my card front I die cut 4 Lifestyle Crafts Nesting Tags (CC-TAGS-01), stamped a different birthday greeting on each, set an eyelet at top center & embellished with fibers and added them to my pockets. I then stamped a large birthday sentiment on the inside of my card. FUN!!

Sunday, June 26, 2011

Saturday, June 25, 2011

Lynette Neus


Used dies to cut red and black cardstock. Mounted words on foam squares. The corrugated cardboard on the bottom was packing material in a box of decorative candles. The card base is Papertrey Ink Kraft.

Thursday, June 23, 2011

This card is called a stepped card and it's perfect for making little scenes.

First take a piece of green card measuring 5.5" by 9". Score at the following intervals 2", 2", 1.5", 1.5" and 1". Fold at the score lines and you have the base of your card. Take a piece of A4 acetate and trim so that it measures 5.5" (same as the card). Fold the acetate in half and put to one side.

To make the scalloped edges, I used the card from the Special Delivery Gift Set. You will need to stick the foam and top pieces to the outside of the card so put these to one side. However, on the middle step attach this first.

Cut out the animals and letters and attach to the card with glue.

Attach the acetate to the front and the back of the base with double sided tape. Hide the tape with the scalloped edges. Finally attach a piece of the scalloped card to the top of the card by folding it over and gluing in place.

Wednesday, June 22, 2011

Mary Pfaff - Tattered Angels

Tattered Angels Tutorial 
Supplies:
Card Stock: The Paper Company ~ Cream, Brown Linen
Lifestyle Crafts ~ Nesting Stars CC-SHAPE-3-021
Prima Flowers
Brown Ribbon
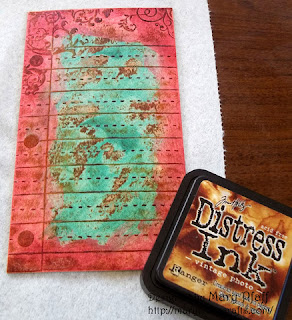
Tim Holtz Distress Ink ~ Vintage Photo
Three Bugs in a Rug ~ Sugar & Spice Rub-on
Light Green Gems
Brayer
Paper Towels
Sponge Applicator
Tattered Angels:
Glimmer Mist: Bahama Blue, Sun Sisters, Wheat Beer
Chalkboard: Alaskan Salmon
Glimmer Glaze: Emerald Cove, Flirty
Chip Tiles: Nature Embossed 
Lay chipboard tile on paper towel. Pour small amount of Flirty Glimmer Glaze on table. Ink sponge applicator. Apply in swirl motion around edge. 
Pour Emerald Cove Glimmer Glaze onto table and apply in swirling motion to center of tile. 
Spray Chalkboard ~ Alaskan Salmon over chipboard tile. Lay a paper towel over wet ink. Brayer. Remove paper towel. 
Ink entire surface of chipboard tile with ink.

To make card, cut brown card stock @ 8” x 11”. Fold.

Cut cream card stock @ 4 ½” X 7”. Round edges. Lay on paper towel. Spray Glimmer Mist ~ Sun Sisters, Bahama Blue, and Wheat Bear sporadically over card stock. Cover with paper towel. Brayer. Let dry. Adhere to front of brown card.

Adhere chipboard tile to card.

Adhere flowers together. Tie knot in ribbon and adhere to center of flower. Adhere to card.
Cut large star from brown cardstock. Sand. Adhere between flower petals.

Apply rub-on to cream card stock. Cut and round corners. Adhere to card.

Add gems.

Monday, June 20, 2011

Lynette Neus


I used the Heart and Vines Frame from the Ornate Frames Set. I embossed a piece of pink textured cardstock that has a white core. After embossing, I sanded it down so the white showed through. All of the embossing was done with the same folder. I cut the hearts (DC0042 Nested Hearts and DC0043 Nested Scalloped Hearts) with Lifestyle Crafts (formerly Quickutz) dies. The scalloped heart was cut from the same pink cardstock and I sanded it down, too. I stamped the image and the sentiment (from Inkadinkado) with London Fog Memento ink. The hearts are mounted on Dimensionals.

Wednesday, June 15, 2011

Father's Day - Featured Designer Challenge

Licence Plate Alphabet
Monogram Accent set CC-SHAPE-4-035
Off white card stock
Olive green scraps
Designer paper
2 Cuttlebug border embossing folders


Monday, June 13, 2011

Father's Day - Featured Designer Challenge

Martha Stewart (42-40087) "Footlights" Edge Punch, Prima (545512) "Alencon Collection 23mm Lace" 3yds, Prima (537203) "Lace 16mm - Cream" 3yds, Quickutz/Lifestyle Crafts (RS-0617) "Star-Nesting" Die

Saturday, June 11, 2011

Independence Day - Marge Robertson

CEM supplies used:
Cookies REV-0135-D (Large Star) die
Billboard Sign Set CC-SHAPE-077-9 (3 small stars)
QuicKutz Stripes Label Embossing Folder EF-A2-016
ZVA Creative Pearls
Other: Alpha Stamps, glitter, baker’s twine

Simply embossed stripes folder onto light blue CS, stamped “Freedom” in label area & added 3 dark blue pearls.
Stamped “Isn’t Free” onto white CS and layered white CS strip onto red card, lining up underneath blue embossed piece.
Took star cookie die and cut from sticker paper, stuck to embossed panel and added glitter.
Die cut 3 small stars from Billboard die set, added to white strip and tied on baker’s twine.

Happy Independence Day everyone!

Friday, June 10, 2011

Father's Day - Featured Designer Challenge

I started with a background that I had received from someone else. (I believe that it was done with the technique found here: http://www.splitcoaststampers.com/resources/tutorials/faux_leather_with_masking_tape/) I stamped the tree on Kraft cardstock with Versamark and embossed with gold embossing powder. I stamped the sentiment with Versamark, also, and embossed with detail gold embossing powder. I cut the tree and the matting (shimmery gold) with L-002 Nesting Squares Round Corners and I cut the sentiment and matting (also shimmery gold) with L-006 Nesting Rectangles. The card base is craft and the background layer is also matted with shimmery gold.

Thursday, June 9, 2011

Independence Day - Mary Pfaff -

Tattered Angels Star Card

Supplies:
Card Stock: Georgia-Pacific ~ White
Lifestyle Crafts ~ Nesting Stars CC-SHAPE-3-021
ZVA Creative Self Adhesive Pearl
1” White Sheer Ribbon
Xyron
Tattered Angels:
Glimmer Mist: Bell Bottom Jeans
Marmalade
Mel’s Diner 
To make card, cut white card stock @ 5 ½” x 5 ½”, and another @ 5 ½” x 11”. Fold.

Take the 5 ½” x 5 ½” piece and lay on paper towel. Spray Bell Bottom Jeans and Mel’s Diner Glimmer Mist across card. Alternating with blue in center. Let dry. Spray Marmalade across previous sprayed section of Mel’s Diner. This creates the right shade of red. Let dry.
Spray scrap sheet, one with Marmalade & Mel’s Diner, and the other with Bell Bottom Jeans. Let dry. Cut out stars.

Cut out white stars.

Run stars and star frames through Xyron. Layer stars together on separate sheet of white card stock. This allows for the tiny white border around star. Hand cut.
Repeat with colored stars.

Layer stars with mount foam. Add ribbon and pearls to card. Adhere stars.

Wednesday, June 8, 2011

Father's Day - Featured Designer Challenge

Just another card for Dad.
It seems, that the card says, you´re a classic, Dad!
For this vintage card I used a basic card in dark blue, a yellow paper inked by me and two patterned paper. The lamp post was made with the die from Lifestyle Crafts. Some embellishments to the left corner and an old vehicle right in the middle. It has a little bit of glimmer. The car is a 3D/ decoupage motif and mounted with foam squares.

Tuesday, June 7, 2011

Independence Day - Vicki Boddicker

July means Independence Day and so many families and friends gather for picnics so I chose to make a card for a July 4th BBQ.
The first thing I did was to cut out the pieces from the BBQ die set using various colored card stock. I assembled the pieces onto white cardstock before I cut out the white oval die. The red oval was cut and then embossed.
Next I cut out letters from navy and red card stock. The whole layout at that point looked too plain but I remembered some patriotic ribbons I had.  
To assemble all the pieces, I very carefully layed them out on the white background to make sure how I wanted the final presentation.
Tiny pieces are difficult to glue or tape so I ran the letters as well as the ribbon through a Xyron. The white and red ovals were attached using tape.

Monday, June 6, 2011

Father's Day - Featured Designer Challenge

Father’s Day Tutorial
Supplies:
Card Stock: The Paper Company ~ Cream, Brown
Dies: Lifestyle Crafts ~ Santa’s Workshop-Wintergreen Mini Album HGS-09-IND, rectangles
Stamps: Stampin’ Up ~ Happy Father’s Day
Tim Holtz Distree Ink ~ Vintage Photo
Colobox Ink ~ Black
Embossing Powder: Sparkle-n-Sprinkle ~ EP Black detail
1/8” Brown/White Ribbon
Brown Floss
Clear Gems
Tattered Angels:
Glimmer Mist: Bell Bottom Jeans, Waterslide
Glimmer Screens: Tattered Traveler
Glimmer Chips: Tattered Traveler 
Lay Glimmer Screen on cream cardstock. Spray Waterslide Glimmer Mist over entire area. Let dry. Cut @ 5 ½” x 5 ½”.
suitcase and binoculars with Bell Bottom Jeans Glimmer Mist. Spray the other suitcase with Waterslide Glimmer Mist. Let dry. Ink with Distress Ink.

To make card, Cut a piece of cream card stock @ 5 ½” x 11. Fold. Adhere designed piece to front of card.

Stamp/emboss greetings. Cut/emboss with nested rectangle. Cut/emboss brown from nested rectangle. Layer with mount foam. Add binoculars. Adhere to card.

Add gems.

Add suitcases with mount foam.

Add ribbon.

Saturday, June 4, 2011

Independence Day - Lynette Neus


Stars cut with 3-021 Nesting Stars
USA and HAPPY 4TH stamps from Studio G
Firecracker stamp from DRS Designs
Colored with Copic Markers, added Star Dust Stickles
Firecracker stamped with Versamark and embossed with Jeweled Gold embossing

Friday, June 3, 2011

Father's Day - Featured Designer Challenge

Supplies:
Lifestyle Crafts Die: Tent REV-0286-S
Retired Lifestyle Crafts Dies:
BBQ Grill (0553)
Sleeping Bag (0690)
Canoe (0696)
Tim Holtz Distress Inks: Antique Linen/Tea Die
FlowerSoft (Sage) 
Craft Foil (BBQ Grill)
Birch Plywood (Canoe)
Alpha Stamps
For masculine cards I try to think of different materials/textural elements to add so I used a 1/64” sheet of birch plywood I’d purchased at a local craft store to die cut my canoe, oars and life vest. It cuts so easily!  I then antiqued the canoe and oars with distress ink and re-cut the life vest in bright orange CS to be mounted next to my tent along the water’s edge. 

Keeping textural elements in mind my next step was to cut my BBQ Grill from craft foil. As seen in this photo I first cut it in a dark blue foil and the rotisserie in silver (the reverse side of the same foil). I later decided I liked the gunmetal foil better, so that’s the one you see on my card photo.
I cut my tent and sleeping bags from CS and assembled all pieces. Before attaching to my BG layers, I antiqued all edges with distress inks, which adds such a nice finishing touch to most projects. On my final green CS piece at the bottom of this card, I added Flower Soft in Sage Green for the grassy area, another fun texture.